

Introduction
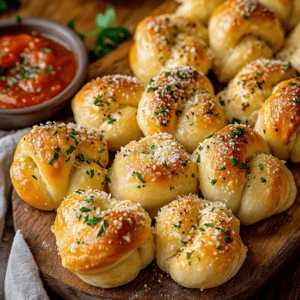
Garlic knots are a beloved appetizer or side dish that has captured the hearts and taste buds of many. Originating from the kitchens of Italian-American families, these savory bites are made by tying pieces of pizza dough into knots, then generously coating them in a buttery garlic herb mixture. What makes homemade garlic knots truly special is the ability to customize flavors and textures to your liking. While store-bought options can be convenient, there’s a unique satisfaction in crafting these delectable knots from scratch. The aroma of freshly baked garlic knots wafting through your kitchen is enough to make anyone’s mouth water and can turn any meal into a celebration.
Making garlic knots at home is surprisingly simple, requiring just a few ingredients and straightforward techniques. This recipe invites you to roll up your sleeves and embrace the art of bread-making, even if you’re a novice in the kitchen. As we delve into the process, you’ll discover that the joy of homemade garlic knots lies not only in their delicious taste but also in the rewarding experience of preparing them yourself.
Understanding the Basics of Garlic Knots
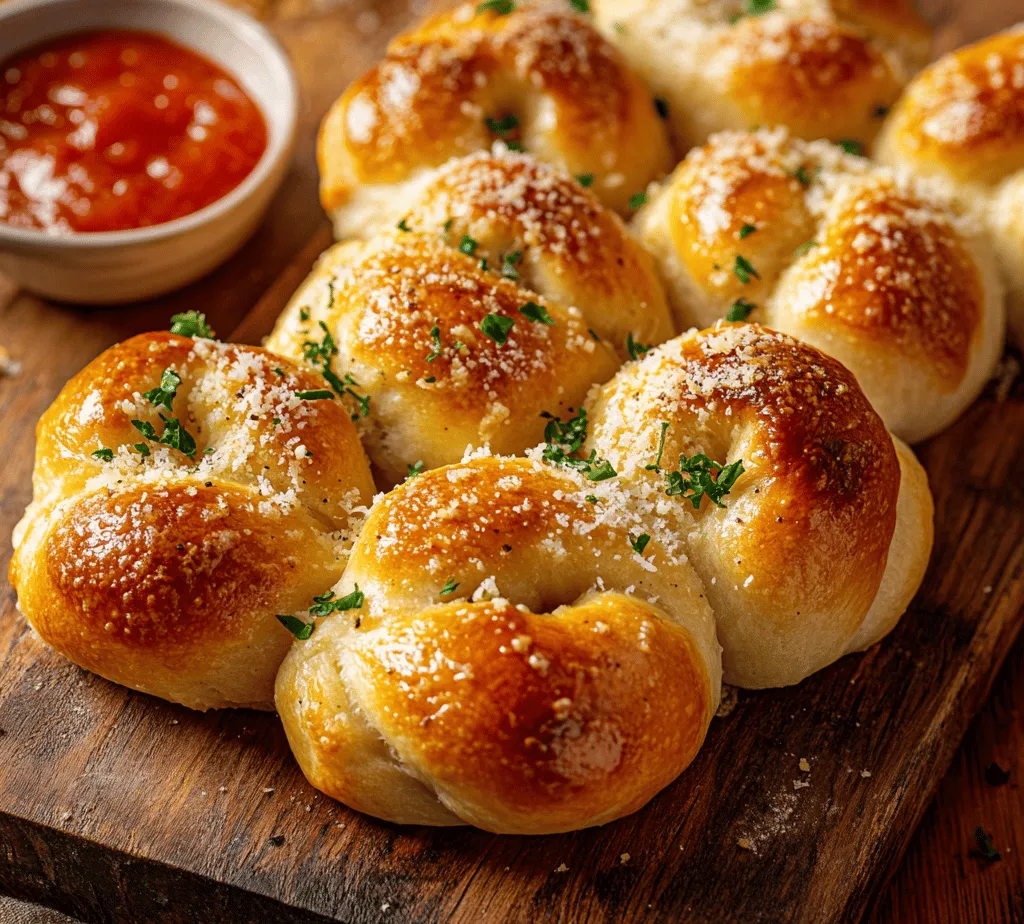
Garlic knots are more than just a tasty treat; they are a delightful combination of bread and flavor that has become a staple in Italian-American cuisine. Traditionally, garlic knots are made from leftover pizza dough, twisted into knots, and baked until golden brown. They are often served warm, brushed with a buttery garlic mixture, making them an irresistible addition to any meal.
These flavorful bites have their roots in the bustling pizzerias of New York City, where chefs sought a way to minimize waste while maximizing taste. The knots became a popular way to use up excess dough, and their popularity quickly spread, transforming them into a staple appetizer in Italian restaurants across the United States. Today, garlic knots are enjoyed not just at pizzerias but also at home gatherings, parties, and as a comforting side dish to pasta meals.
Garlic knots can come in various forms, from classic recipes that focus on the garlic and herb flavoring to more adventurous iterations that incorporate cheese, spices, or even stuffed fillings. They can be served plain or with marinara sauce for dipping, making them a versatile addition to any dining experience. Whether you’re looking for a way to impress guests at your next dinner party or simply want to indulge in a beloved comfort food, homemade garlic knots are sure to satisfy.
Essential Ingredients for Homemade Garlic Knots
Before diving into the recipe, it’s important to familiarize yourself with the essential ingredients that will bring your homemade garlic knots to life. Each component plays a crucial role in achieving the perfect flavor and texture.
All-Purpose Flour
All-purpose flour serves as the foundation of the dough, providing the structure needed for your garlic knots. Its moderate protein content allows for a tender yet sturdy texture, making it ideal for yeast-based recipes. When measuring flour, it’s best to use the spoon-and-level method to avoid packing too much flour into your measuring cup, which can lead to a dense final product.
Active Dry Yeast
Active dry yeast is vital for leavening the dough, allowing it to rise and develop a light, airy texture. Yeast is a living organism that ferments the sugars in the dough, producing carbon dioxide gas that causes the dough to expand. It’s essential to activate the yeast in warm water (typically between 110°F to 115°F) before incorporating it into the dough. This step ensures that the yeast is alive and ready to work its magic.
Warm Water
Warm water is crucial for the activation of the yeast. When combined with sugar and yeast, warm water creates an ideal environment for fermentation. It’s important to avoid water that is too hot, as it can kill the yeast, preventing proper rising. A thermometer can be helpful for ensuring the perfect temperature.
Sugar
Sugar plays a dual role in this recipe. It not only adds a touch of sweetness to balance the flavors but also provides nourishment for the yeast, promoting fermentation. The sugar helps the dough rise and contributes to a golden-brown crust when baking.
Salt
Salt is an essential ingredient for enhancing flavor and strengthening the dough. It helps to control the yeast’s activity, ensuring that the fermentation process occurs at a steady pace. Additionally, salt can improve the overall texture of the dough and provide a well-rounded taste that elevates the garlic knots.
Olive Oil
Olive oil adds richness and moisture to the dough, contributing to a tender and flavorful final product. It also helps to prevent the dough from sticking and makes it easier to work with. The use of high-quality extra virgin olive oil can impart additional flavor to the garlic knots.
Garlic
Garlic is the star of this recipe, providing the signature flavor that makes garlic knots so irresistible. You can use fresh garlic cloves, minced finely, or opt for pre-minced garlic for convenience. Fresh garlic will give a robust, aromatic flavor, while pre-minced garlic can save time without sacrificing too much taste.
Herbs
Herbs, such as dried oregano and fresh parsley, are commonly used to enhance the flavor of garlic knots. Oregano provides a warm, earthy note that complements the garlic, while parsley adds a fresh, vibrant touch. Adjust the amount of herbs according to your personal preference to create your ideal flavor profile.
Parmesan Cheese
While optional, freshly grated Parmesan cheese can be a delightful addition to your garlic knots. Sprinkling cheese over the knots before baking adds an extra layer of flavor and a hint of nuttiness that pairs beautifully with the garlic and herbs.
Step-by-Step Instructions for Making Garlic Knots
Now that we’ve covered the essential ingredients, it’s time to embark on the journey of making your own homemade garlic knots. Below are the detailed steps to create these delicious bites from scratch.
Step 1: Prepare the Yeast Mixture
Start by activating the yeast. In a small bowl, combine warm water (about 1 cup) with sugar and the active dry yeast. Stir gently to dissolve the yeast and let it sit for about 5-10 minutes until it becomes frothy. This indicates that the yeast is active and ready to use.
Step 2: Make the Dough
In a large mixing bowl, combine the all-purpose flour and salt. Once the yeast mixture is ready, pour it into the bowl with the flour, along with the olive oil. Using a wooden spoon or your hands, mix the ingredients until they form a rough dough.
Step 3: Knead the Dough
Transfer the dough onto a floured surface and knead it for about 5-7 minutes until it becomes smooth and elastic. If the dough is too sticky, you can sprinkle a little more flour as needed. Proper kneading is essential for developing the gluten structure, which gives the knots their chewy texture.
Step 4: Let the Dough Rise
Place the kneaded dough in a lightly greased bowl, cover it with a clean kitchen towel or plastic wrap, and let it rise in a warm environment for about 1 to 1.5 hours, or until it has doubled in size. This step is crucial for creating light and airy garlic knots.
Step 5: Shape the Knots
Once the dough has risen, punch it down gently to release any air bubbles. Divide the dough into equal pieces, typically about 8 to 12, depending on your desired size for the knots. Roll each piece into a long rope (approximately 6-8 inches) and tie it into a knot.
Step 6: Prepare the Garlic Butter Mixture
While shaping the knots, you can prepare the garlic butter mixture. In a small saucepan over low heat, melt butter and add minced garlic, dried oregano, and a pinch of salt. Allow the mixture to simmer for a minute or two—just enough for the garlic to infuse its flavor into the butter.
Step 7: Preheat the Oven and Bake
Preheat your oven to 375°F (190°C). Place the shaped knots on a parchment-lined baking sheet, leaving some space between each one. Brush the garlic butter mixture generously over the top of each knot. If desired, sprinkle freshly grated Parmesan cheese on top for added flavor.
Step 8: Bake Until Golden
Bake the garlic knots in the preheated oven for about 15-20 minutes, or until they are golden brown and cooked through. Keep an eye on them towards the end of the baking time to prevent over-browning.
Step 9: Final Touches
Once baked, remove the garlic knots from the oven and immediately brush them with any remaining garlic butter mixture. Garnish with fresh parsley if desired, and serve warm.
This step-by-step guide sets you on the path to creating irresistibly delicious homemade garlic knots. Stay tuned for more tips and suggestions on how to perfect your garlic knots and enjoy them at their best!
Activating the Yeast
The first step in making delicious homemade garlic knots is activating the yeast. This process is crucial because it ensures that your dough rises properly, leading to soft and fluffy knots. To activate your yeast, you’ll want to use warm water—ideally between 100°F to 110°F (38°C to 43°C). If the water is too hot, it can kill the yeast, while water that is too cold will not activate it adequately.
To activate, combine 1 tablespoon of sugar with 1 packet (2 1/4 teaspoons) of active dry yeast in a bowl. Pour the warm water over the mixture and stir gently. Allow it to sit for about 5-10 minutes. You’ll know the yeast is ready when it becomes frothy and bubbly, indicating that the yeast is alive and active. This frothy layer is essential for producing the carbon dioxide needed to make your dough rise.
Preparing the Dough
Once your yeast is activated, it’s time to prepare the dough. In a large mixing bowl, combine 3 ½ cups of all-purpose flour, 2 teaspoons of salt, and the activated yeast mixture. To mix effectively, start by using a wooden spoon or a dough whisk until the flour is mostly incorporated. As the mixture comes together, you can switch to using your hands to knead the remaining flour into the dough.
This method helps to ensure that all the ingredients are evenly distributed, creating a consistent texture throughout the dough. If the dough feels too sticky, you can gradually add more flour, one tablespoon at a time, until it reaches a workable consistency.
Kneading the Dough
Kneading is a fundamental step that helps develop gluten, which contributes to the elasticity and strength of your dough. Once your ingredients are well mixed, transfer the dough to a lightly floured surface. Start kneading by pushing the dough away from you with the heel of your hand, then folding it back over itself. Rotate the dough a quarter turn and repeat this process.
Knead the dough for about 8-10 minutes. You’ll know it’s ready when it feels smooth and elastic, and springs back slightly when pressed. If you’re new to kneading, don’t worry; it’s about practice. The more you knead, the better you’ll get at recognizing the right texture.
First Rise
After kneading, it’s time for the dough to rise. Place the dough ball in a greased bowl, turning it to coat the entire surface with oil. Cover the bowl with a clean kitchen towel or plastic wrap, and let it rise in a warm, draft-free area. This first rise, also known as fermentation, allows the yeast to work its magic, producing carbon dioxide and causing the dough to double in size.
Typically, this will take about 1 hour, but it can vary based on room temperature. Keep an eye on the dough, and once it has doubled in size, it’s ready for the next step.
Shaping the Knots
Once your dough has risen, it’s time to shape the garlic knots. Start by punching down the dough gently to release the gas bubbles. Transfer it to a floured surface and divide the dough into 12 equal pieces. Roll each piece into a rope approximately 6-8 inches long.
To create the knot shape, take one rope, make a loop, and pull the ends through the loop. Tuck the ends underneath to secure the knot. Alternatively, you can twist the rope into a knot shape and tuck the ends underneath as well. Place each knot on a baking sheet lined with parchment paper, leaving some space between each for the second rise.
Second Rise
The second rise is just as important as the first. It ensures that your garlic knots become light and fluffy. Cover the shaped knots with a kitchen towel and let them rise for another 30 minutes in a warm environment. During this time, the yeast continues to work, and the dough will puff up beautifully.
Preparing the Garlic Butter
While your knots are rising, it’s time to prepare the garlic butter that will elevate their flavor. In a small saucepan over low heat or in a microwave-safe bowl, combine ½ cup of unsalted butter with 4-5 cloves of minced garlic. Melt the butter slowly to avoid burning the garlic, which can turn bitter. Once melted, stir in 1 teaspoon of dried oregano and a pinch of salt. This mixture will infuse the knots with a rich, garlicky flavor that’s simply irresistible.
Baking the Knots
Preheat your oven to 375°F (190°C) while the knots complete their second rise. Once preheated, bake the garlic knots for 15-20 minutes or until they turn golden brown. Keep an eye on them towards the end of baking to ensure they don’t over-bake. The ideal garlic knot is golden on the outside but soft and airy on the inside.
To check for doneness, you can tap the bottom of one of the knots; it should sound hollow. Alternatively, an instant-read thermometer can be used; the internal temperature should be around 190°F (88°C).
Finishing Touch
Just as soon as they come out of the oven, brush the warm garlic knots generously with the garlic butter mixture. This final touch not only enhances the flavor but also gives them a beautiful shine. You can sprinkle some freshly chopped parsley for added freshness and color.
Serving Suggestions for Garlic Knots
Homemade garlic knots are incredibly versatile and can be served in many delightful ways. For a classic experience, pair them with marinara sauce for dipping. The tanginess of the sauce complements the rich garlic flavor perfectly. Alternatively, you can serve them with a drizzle of olive oil or a side of garlic aioli for a gourmet touch.
For a creative twist, consider using garlic knots as a base for mini pizzas or sliders. Simply slice them open, add your favorite toppings, and broil them for a few minutes until the cheese is melted and bubbly. This method not only makes for a fun appetizer but also brings a unique flavor to your ordinary pizzas.
Garnishing your garlic knots can elevate their presentation. Fresh herbs like basil or parsley can add a pop of color and freshness. Additionally, a sprinkle of grated Parmesan cheese or mozzarella can enhance the cheesy goodness of the knots.
Nutritional Information
Garlic knots, while delicious, are best enjoyed in moderation. Each knot contains approximately 150 calories, primarily from carbohydrates and fats. They are a comforting treat that can be part of a balanced diet when enjoyed alongside a healthy meal.
To make garlic knots a bit healthier, consider using whole wheat flour instead of all-purpose flour. This substitution will add fiber and nutrients to your knots. You can also reduce the amount of butter in the garlic mixture or use a lighter alternative, like olive oil, to cut down on saturated fats while still packing in flavor.
Conclusion
Preparing homemade garlic knots is a delightful experience that brings joy not only from the cooking process but also from sharing them with family and friends. The aroma of freshly baked garlic knots wafting through your kitchen is sure to create a warm and inviting atmosphere.
As you become more comfortable with this recipe, don’t hesitate to experiment with different flavors, such as adding herbs to the dough or trying out various dipping sauces. Each variation can provide a new twist on this classic favorite.
Ultimately, the communal experience of enjoying garlic knots—whether at a family dinner, a casual gathering, or game night—truly embodies the spirit of home cooking. So, gather your loved ones, bake a batch, and enjoy the satisfaction that comes from sharing delicious, homemade garlic knots.